Update: Since this blog has been published, we’ve successfully launched cheqd mainnet and updated our tokenomics. However, if you’re looking to hodl $CHEQ and participate in our governance votes, all the information below is still relevant.
***
Disclaimer: All information provided is intended to help users get set up on cheqd. However, we do not expressly recommend or mandate a certain approach. All actions taken are your personal responsibility. Much of the content of this article was created using the Keplr FAQ, Keplrs account creation blog and wallet setup guide, which you should cross-check for further information.
In the coming weeks, we’ll be launching our network. This article will provide you with a few steps on how you can set up your Cosmos wallet.
As the cheqd network has been built on Cosmos, we’ll be using wallets that integrate directly with the Cosmos ecosystem and our initial Decentralised Exchanges (DEX) — we’ll share more information on this at a later time.
Here’s where Keplr comes in…
What is Keplr?
Keplr is a Cosmos wallet that has been praised for putting the user at the heart of the experience. As the first and leading Inter-Blockchain Communication (IBC) enabled wallet for the Cosmos ecosystem, Keplr offers users the ability to stake their tokens, use blockchain apps and manage multiple tokens in one wallet.
Slow down… IBC? IBC, or Inter-Blockchain Communication Protocol, is an interoperability protocol for relaying messages between different Cosmos chains, launched earlier this year. Essentially it allows users to complete token transfers between various chains on the Cosmos Hub. As Keplr is IBC enabled, users can execute transfers of tokens within the wallet or through connected DEXs (we’ll come to this in the next piece).
Now back to Keplr.
For those a little new to crypto, Keplr is a software wallet, meaning it can be installed on a mobile or as a browser extension in chrome or safari, for example. Although less secure than hardware wallets (like a Ledger), paper wallets, or backups, software wallets offer a much more convenient experience for the user as they allow users to store their mnemonic locally on a computer.
“What is a mnemonic?” I hear you say…
Good question.
A mnemonic (said with a silent m — “nuh-mon-ic” — if you really want to impress your crypto friends), mnemonic phrase, mnemonic seed, or simply seed phrase is a string of 12–24 words that represent the private key to your wallet. When used in the correct sequence, they give users access to their cryptocurrencies stored within a wallet in the same way a private key does. As private keys generally are made up of a combination of letters and numbers, which are difficult to decipher, mnemonics are used to make it possible to understand the private key.
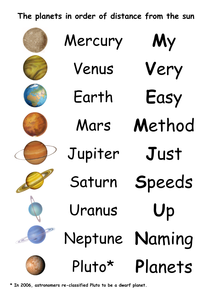
We all have childhood memories of creating easy-to-remember phrases to recall things like the planets in our Solar System before crypto was ever invented and when Pluto still had a seat at the Solar System table.
The fancy word ‘mnemonic’ is exactly this. Literally, it refers to a memory aid like a rhyme, abbreviation or song that helps to remember something else. Ironically, the word itself is much less easy to remember.
In the context of digital assets, mnemonics are used to protect your wallet in the event that the computer that it was running on died, was lost or stolen. The mnemonic, usually 12 words, can be typed in the sequence it was created to restore the wallet and your access on a new device. In this case, you will not need to store a separate version of your mnemonic as the Keplr application itself manages this for you.
Setting up a Keplr Wallet on PC/Mac
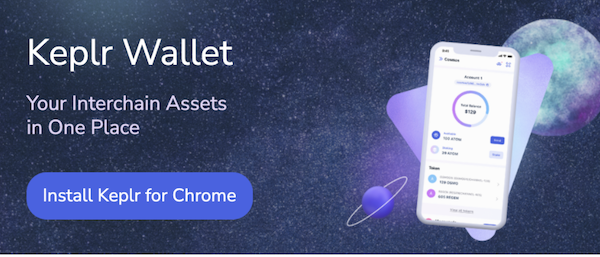
- Go to the Keplr website https://www.keplr.app/ to find the relevant extension for your browser. If you’re using Chrome, which we’d recommend, click here → browser extension
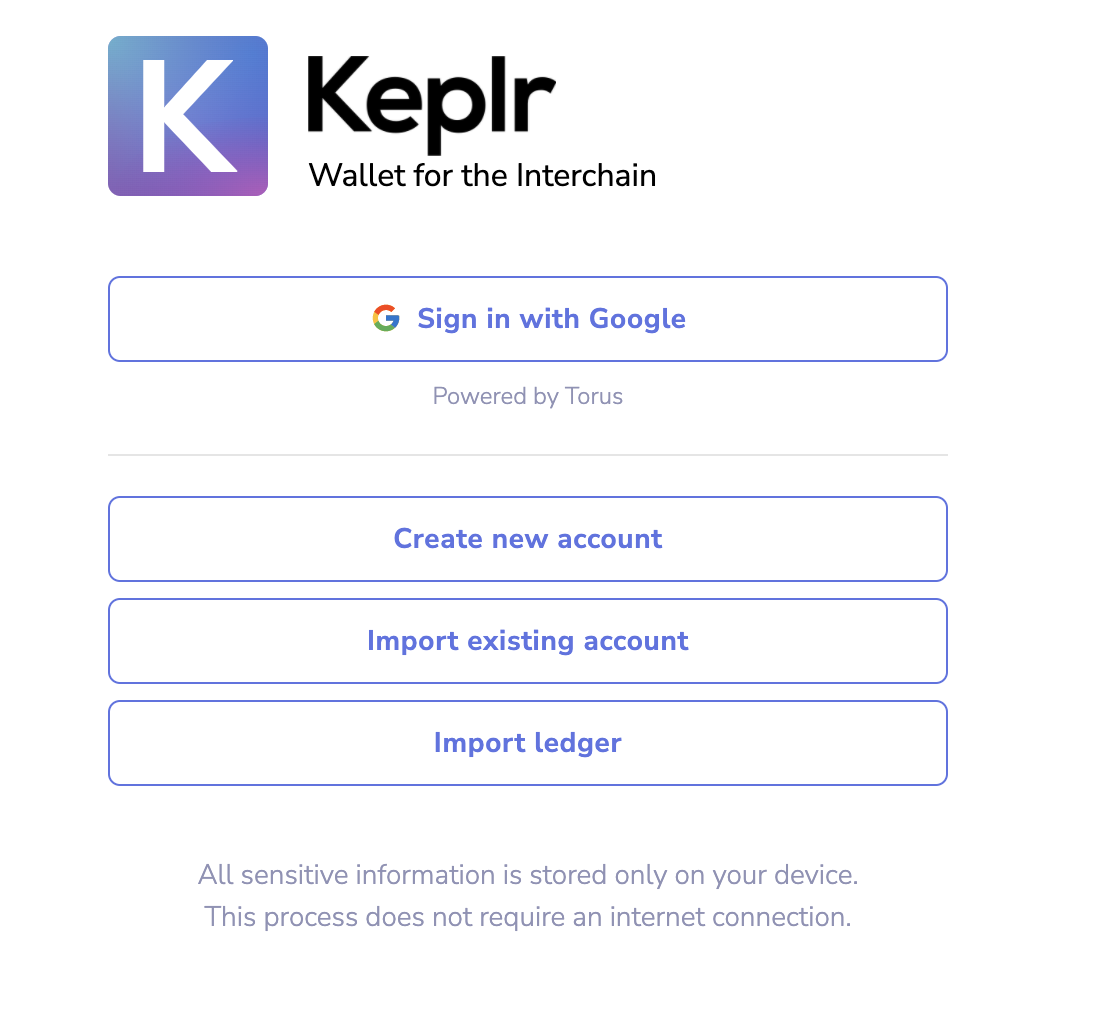
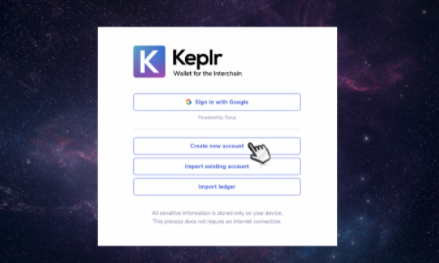
- Once you’ve installed Keplr wallet, you’ll see four options to set up an account:
1) Google Single Sign On (SSO) / One-Click Login,
2) Create a new account by setting up a new seed/mnemonic phrase,
3) Import an existing account, or
4) Import your Ledger account
In this guide, we’ll assume you have not used Keplr before and, therefore, will take you through options 1 and 2
Note: The Keplr team will never reach out and ask you to validate your wallet or type your mnemonics. Be careful of scammers.
Option 1: Google SSO / One-Click Login
For the highest level of security when using Keplr, we’d recommend this option. With Google SSO, you can enable Two Factor Authentication (TFA), which enhances your security through adding a second factor. For example, you can use SMS (NOT recommended), a software authenticator, or a hardware key like Yubikey or Google Titan Key.
- Select Sign In with Google
- Enter an account name (this can be changed later) and a password
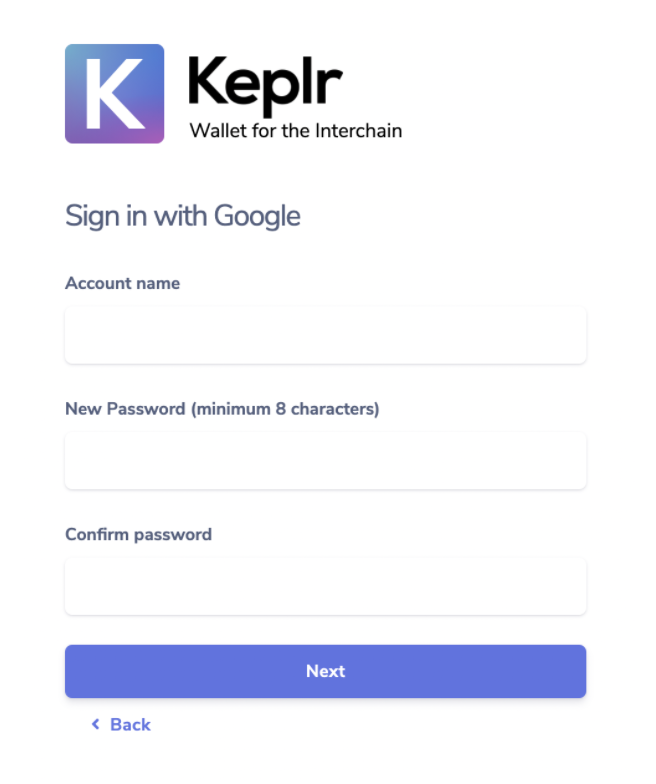
- Next, you’ll be prompted to sign in to your Google account with your email or phone (and later password). Click [Next].
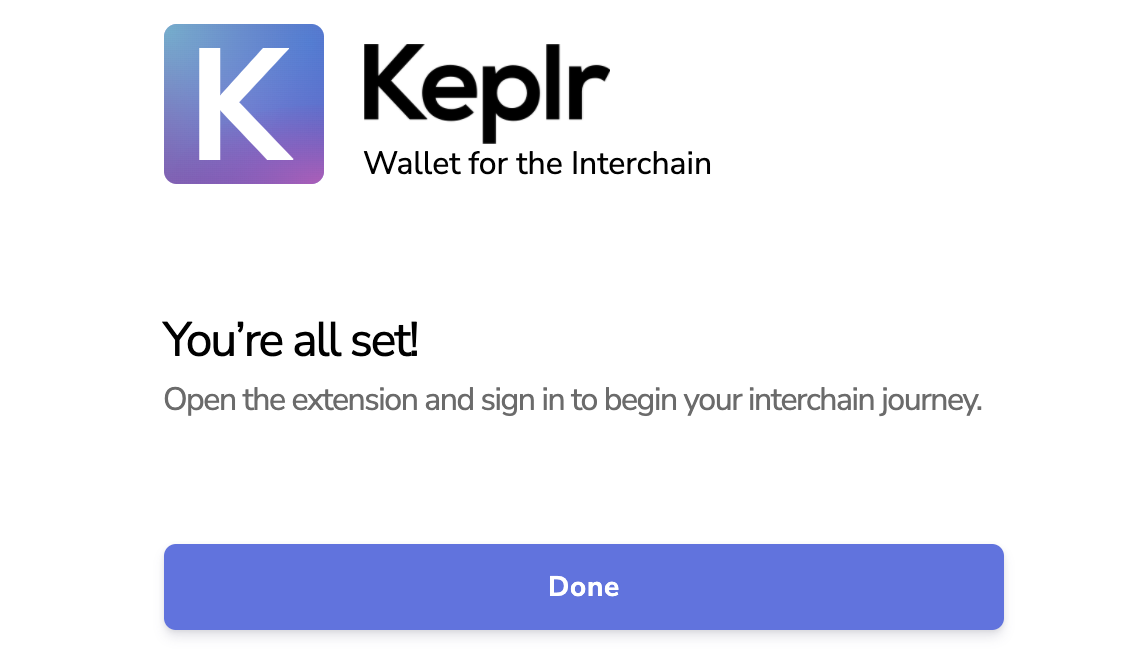
- And that’s it! You now have a Keplr wallet.
Note: By using Google SSO, you will not have to store your mnemonic as your access is managed by Google. With the extension, you can access your private key at any time; however, you will not see a mnemonic. To do this, click on your profile icon and select the account, and use the three dots to select the information you want to see (you’ll need your password to do this).
Option 2: Create an Account via Secret Seed/mnemonic Phrase
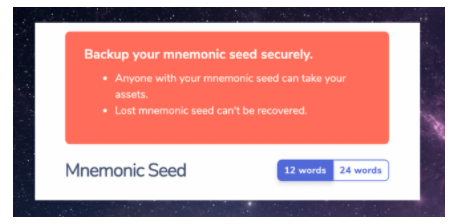
- By clicking on the Keplr browser icon for the first time will take you to the accounts setup page. Choose option [Create new account].
2. The next page shows you your secret seed/mnemonic phrase.* You can select a 12 or 24-word phrase. Save this phrase in a secure place but also do not lose it. (You’ll need to input this phrase into the following page.)
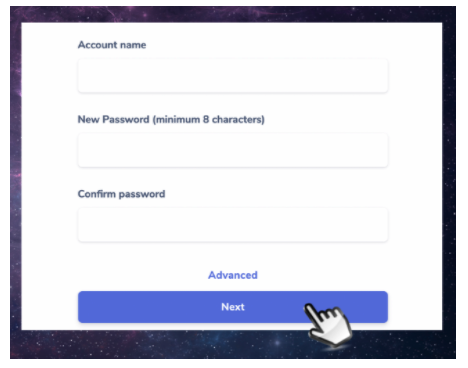
3. Next, enter a name for your account and password (you can change these later). Click on [Next].
4. To confirm the creation of this new account, you’ll need to click on the words in the right order in which they appear in your seed/mnemonic phrase and press [Register].
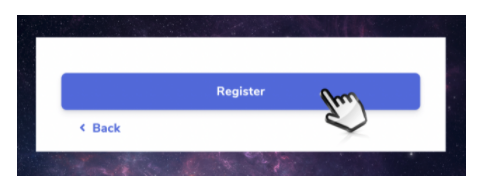
5. Congratulations! 🎉 You are now the owner of a Keplr wallet account and are ready to explore the interchain.
Copying a wallet address from Keplr
To receive tokens into your Cosmos wallet, whether you are depositing yourself from another wallet or you are required to do so to receive tokens from another party, you will need to provide a wallet address.
To do this, enter your Keplr app through the Browser extension by clicking on the small ‘K’ icon. If this does not come up, click the puzzle icon and find the Keplr app here (you can pin this to your browser to access your wallet more easily in the future)
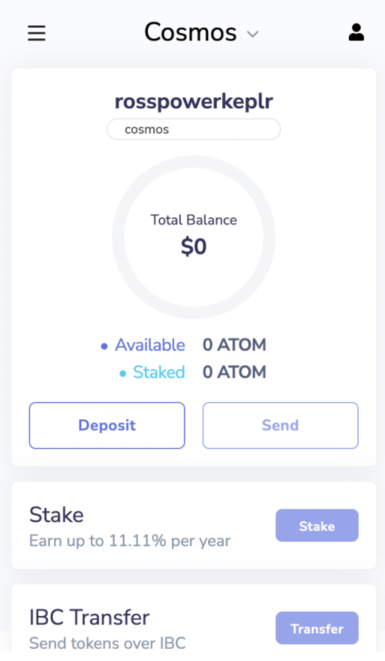
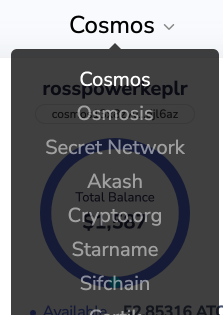
Once you’re in, you’ll automatically see the Cosmos wallet, which holds ATOM tokens.
To provide a wallet address for Cosmos, please make sure you are within this wallet. Below your name, you will see an address beginning with ‘cosmos1’ followed by numbers and letters. To copy this, CLICK on the wallet address itself, and you will see an alert pop-up stating, ‘Address copied!’
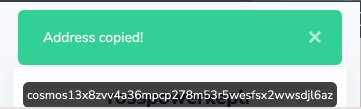
This will now be the most recent information you have copied. When you are ready to paste — either right-click your mouse and select paste OR use ‘ctr-v’.
As a final step, always ensure you have double-checked the address by cross-checking the final four digits of the address you have pasted against your address in your wallet.
Note: this method works for Cosmos, cheqd and all other tokens building on Cosmos, which appear in the dropdown menu. If you’ve been asked to provide a Cosmos wallet address by the cheqd team, you’ll be guided on how to view this in your Keplr wallet at a later date (this is pending CHEQ being listed on Keplr).
Setting up multiple accounts on Keplr
In some cases, you may be required to set up multiple accounts on Keplr. You can do this within the Keplr extension you have set up in the previous steps:
- Select the Keplr extension from your browser
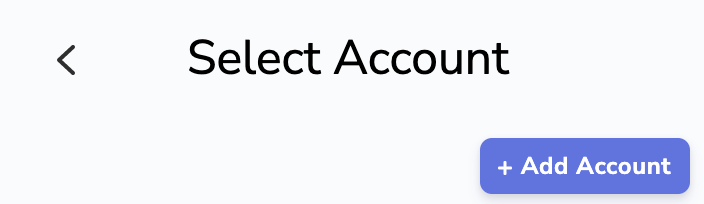
- Select your profile icon on the top right of the pop-up
- Select ‘Add account’. This will take you to the start of the process above. Please follow the same instructions to set up your additional account
Setting up a Keplr Wallet on your smartphone.
Although we’d highly recommend following the instructions above (i.e. setting up your wallet as a browser extension) as this will provide a much more seamless experience when connecting to Decentralised Exchanges, you can also log in using your phone.
If you have done the above already, once you have downloaded the Keplr app, when logging in, you will be required to provide either the mnemonic seed OR you can log in through Google SSO.
If it is your first time and you would prefer to use your phone, you can follow the steps above as a guide and set up your wallet directly through the app (always remember to store your mnemonic safely!)
Adding the cheqd network to your Keplr wallet
To see $CHEQ in your Keplr wallet, you’ll need to follow the steps below, which enable Keplr to auto-discover the cheqd network.
- Sign in to your Keplr wallet on your browser (do not use the mobile app)
- Go to our dashboard at https://cheqd.omniflix.co/.
- Click “Connect” in the top right corner to link your Keplr to the dashboard
- You will see a pop-up that asks you to approve adding cheqd-mainnet-1 to your Keplr wallet.
- Click “Approve.”
- On the Keplr extension in your browser, click the drop-down menu at the top. Scroll down to below “ — — Beta support — — ” where you will find the cheqd wallet
- You will now be able to see your balance in $CHEQ.
- See the link for further instructions on sending $CHEQ, staking and other information, with helpful screenshots.
A reminder of best practices
- Always save your mnemonic or private key.
- Don’t use ctrl-c or copy when copying. Instead, use the built-in function within wallets to copy your keys.
- Store multiple copies of your mnemonic in secure locations to which you won’t lose access!
- Never share your private keys, mnemonic seed or password with anyone.
- Never screenshot your mnemonic seed, as you may forget to delete these.
Get ready...
If you haven’t already joined our Telegram group, follow us on Twitter and sign up for a surprise.
***
Update: In the meantime, take a look at the cheqd journey so far to get up to speed on where we are, where we are headed next, and how you can get involved. Our next stop is payment rails.